Spring Cleaning Tips and Tricks for Your Kitchen
Let’s not beat around the bush - housekeeping is hard. With busy schedules, it can be difficult to keep things spick and span while also running a household and working 9-to-5. While it’s unlikely that you’ll be able to re-organize your house from top to bottom every week, spring is the perfect opportunity to find some time to freshen up your house and say goodbye to those winter blues. And there’s no better place to start than the heart of your home – the kitchen.
STEP 1: Get ready and prepare
First, gather all your cleaning supplies. This includes gloves, sponges, dish cloths, and a cooler (more on this later), as well as natural cleaners like lemon, baking soda, vinegar or any other favourite cleaning solutions. It’s also a good idea to set out a large garbage bag for any items you may be throwing away. And don’t forget to turn up the music because you might as well have some fun while you’re cleaning!

STEP 2: Re-organize the cabinets and pantry
To begin, pull out all items and sort them into “keep” and “trash” piles. Make sure to throw away any expired or stale food, as well as combine half-used containers of the same product to save much-needed shelf space. Wipe down cabinets and shelves to remove any dirt or residue before setting the items neatly back in place.
STEP 3: Clean microwaves, ovens and cooktops
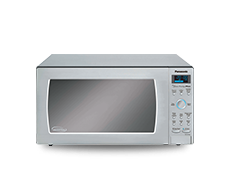
Refresh your microwave naturally by placing a ½ cup of water and half a lemon in a bowl and microwaving for 3 minutes. Let stand for 5 minutes to allow the steam to help loosen all the food debris inside, then easily wipe away with a cloth.
For the oven, start by making a baking soda paste by combining a ½ cup of baking soda with a few tablespoons of water. Wearing gloves, coat all surfaces of the oven with the paste, except heating elements, and let sit overnight. In the morning, take a damp dish cloth and wipe clean.
Dryer sheets also work wonders on a dirty glass cooktop. Simply wet the dryer sheet, leave on top of burnt food stains for 15 minutes and use it to scrub away the debris.
STEP 4: Deep clean your fridge
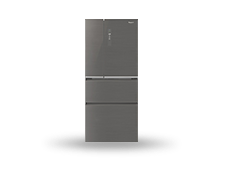
To truly deep clean your fridge, start by removing all the contents (yes, all!), throwing away any expired items and storing the rest in a cooler. Take out all the removable drawers and shelves and wash them with a sponge and dish soap. Drawers with bits of stuck on food may need a warm soak to help remove stubborn particles.
Using a wet sponge or rag with hot water, wipe clean the interior of the fridge. Once completed, return the drawers and shelves into place. Here’s a good time to evaluate if a shelf’s placement should be adjusted to allow for more room for larger items. Lastly, neatly place all items back into the fridge. Don’t forget to wipe down the exterior, too!
STEP 5: Wash out your sink and dishwasher
Did you know your kitchen sink can harbour more bacteria than your toilet? Using baking soda, soap and a little hot water, scrub all surfaces, edges and the drain. For stainless steel sinks, sprinkle a thick dusting of flour and use a paper towel to buff all the surfaces to get a sparkling finish.
For your dishwasher, simply fill a dishwasher safe mug with 1 cup of vinegar and place on the top rack. Run your dishwasher on the normal cycle with hot water to loosen all the soap scum, food debris and grease.
Now that you’re all done, kick up your feet, relax and enjoy your sparkly clean kitchen!


